Garden View

Garden View
Hello and Welcome! I decided to start this blog for everyone out there who has an interest, or WANTS to be interested, in living a life that is a little more sustainable. I am still learning, and invite you to follow this blog to learn along with me. I will share what I have learned as we go, and hopefully you will pitch in and share what YOU are doing to live a little more off of what you can grow and DO from home. PLEASE BELIEVE ME when I say, if I can learn how to do this on a very small backyard plot in a city, then ANYONE can do this!!

Search This Blog

Monday, September 24, 2012

Piccalilli and the Coop-Scoopin' Boogie, Continued


Ah, Chore Day.  It's the day of the week where adults and children alike happily skip about, moving form one chore to the next on their own ambition.  No reminders or arguments about responsibility and doing your part.  Nope-just blissful content at being able to......HA!  AND THEN I WAKE UP!  Yeah, we have to remind our children that chores still come around every week, and, no it hasn't changed days of the week or time of the year this week.  Clothes need to be washed, floors to be swept and scrubbed, bathrooms to be cleaned (and yes-you need to scrub that toothpaste off the back of the door-again).  Once the chores begin, however, everyone does seem to settle into a rhythm of their own.  One hops up out of bed in the morning and hurries to get things done so he can play.  Another procrastinates all-day-long.  At some point, when the REAL work is beginning, we will eventually hear the swooning-tweenager sounds of Justin Bieber.  (Yes, I know ALL the songs and most of the words, thank you very much.  I even serenaded my husband with one once.....but I digress).  Eventually we will move outside to do some coop-scoopin'.  I actually enjoy picking up their run, spreading out some fresh cut grass and fixing up their house.  They even get some fresh mints, herbs, and spent nasturtium flowers from the garden in their coop and nest box when we are done.  I feel it's the least I can do for the ones who make me breakfast every morning!  I feel (almost) guilty at times since chickens are so easy to take care of.  I feel that they give me way more in return for the simple things I do for them.                                  

In addition to chores this weekend, I ventured into a realm that has never been ventured-into before in my life story....canning!  I had such a huge crop of tomatoes this year, that I was able to harvest 13 pounds of green tomatoes alone!  I have another 10+ waiting to be canned for salsa next weekend!  And all of that from just TWO tomato plants!  I learned a lot of tips this season about canning.  In fact, I saw this recipe for Green Tomato Relish from Green Circle Grove.  I never even knew green tomatoes had a purpose (thank you so much for sharing your awesome recipe Meredith)!  I love sweet relish and wanted to give canning a try.  I found that Green Tomato Relish is also called Piccalilli.  There are several different types you can make, but most are basically the Western interpretation of Indian Pickles; in short, it's pickled vegetables with spices.
I found different variations of the recipe in many places throughout the Internet, but I settled on this one from Cooks.com (and I added my comments from what I experienced with it along the way):


Pot full of Piccalilli ready to cook

Piccalilli/ Green Tomato Relish               


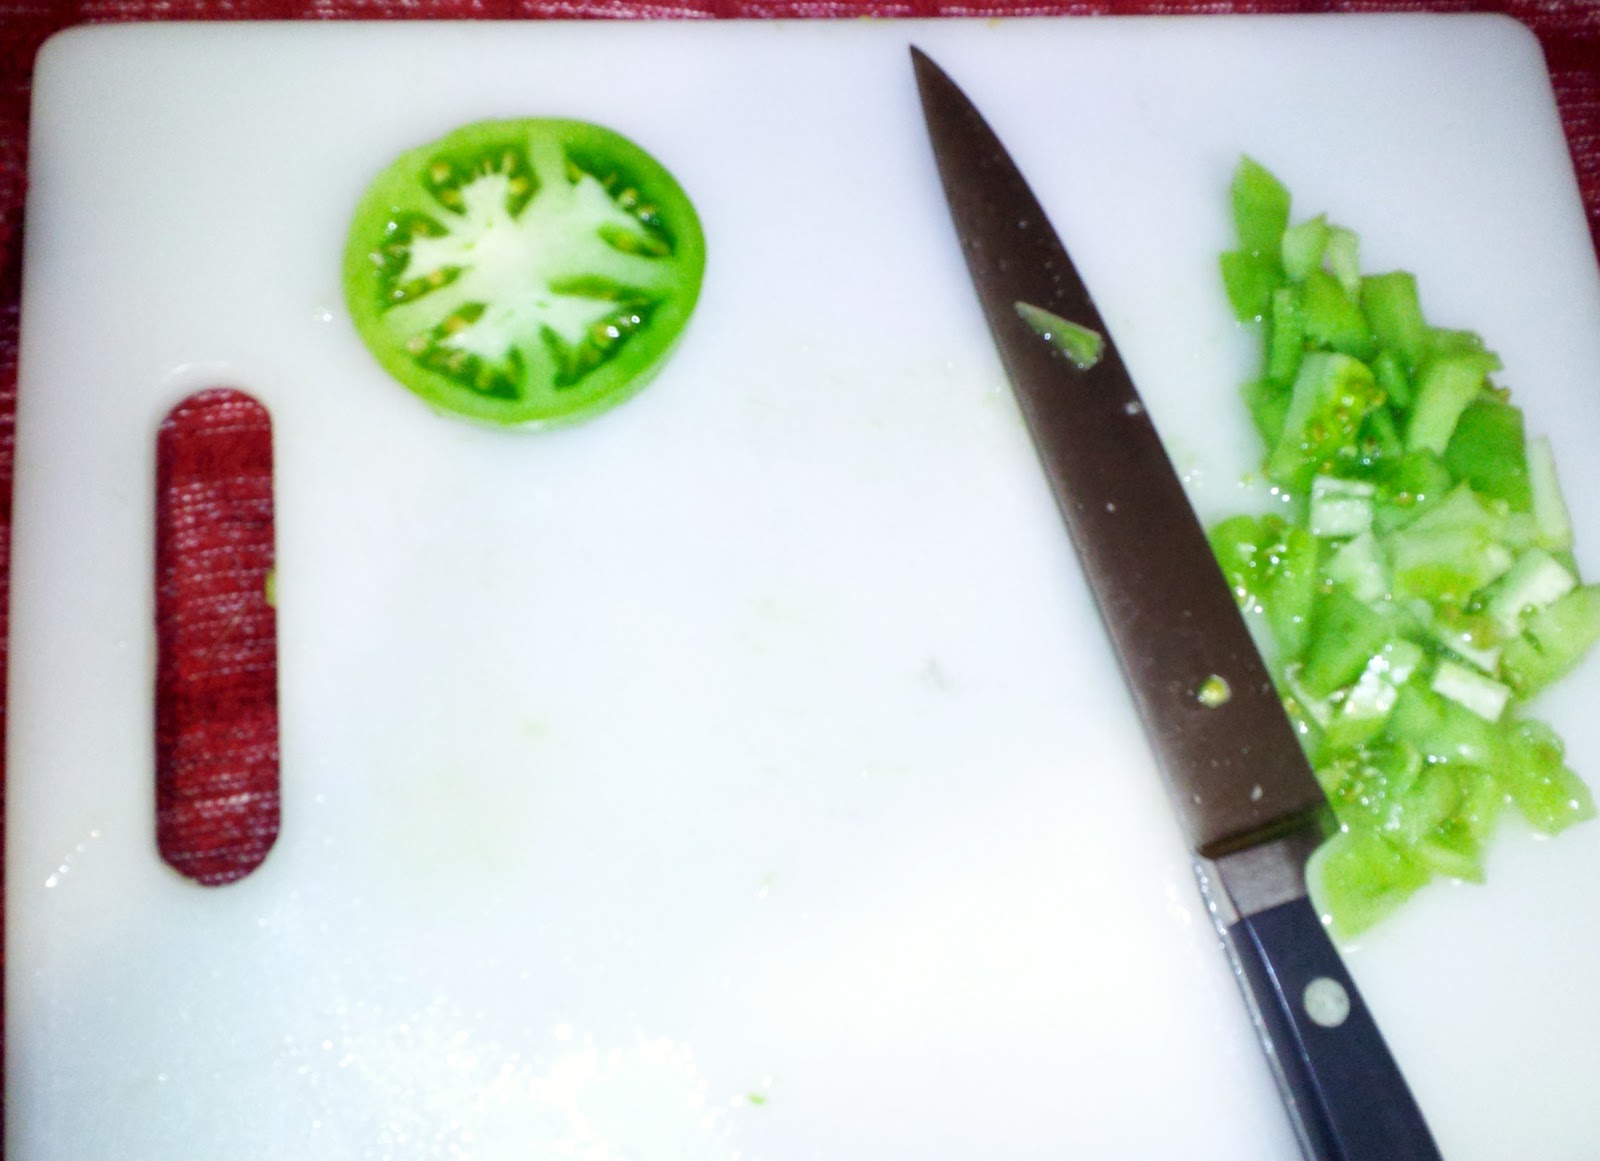
11 lbs green tomatoes, chopped

4-5 green tart apples, chopped
4-5 onions, peeled and chopped
1 large green pepper, seeded and chopped
3 1/2 cups Apple Cider Vinegar
4 celery stalks (with leaves), chopped
2 cups brown sugar
2 cups white sugar
2 tablespoons whole mixed pickling spice
1 cup water
1/2 cup canning salt

  1. Salt the chopped tomatoes, wrap in a cheesecloth or cloth sack and let the juices drain out overnight (I used cheesecloth from the store draped across a colander-dumped and bundled the chopped/salted tomatoes into it and let it drain overnight in the sink). 
  2. Place the tomatoes in a large stockpot in the morning, add onions, celery, green pepper, sugars, apples, vinegar and water.  Then stir in the pickling spices.  Cook over low heat, stirring often, about 2-3 hours until vegetables begin to stick to the bottom and water is gone (I brought the mixture to a simmer and it took about 4 hours for the water to evaporate AFTER it came to a simmer--longer cooking time could have been the altitude?).  

Before the mixture is done cooking have the following ready:  


"Jar Grabber"
From top: Lid Seal and 2 Lid Rings
  • 7-9 pint size jars (my mixture took 8).  Wash the jars and lid rings ahead of time in the dishwasher or with hot soapy water.  Do NOT put the seal tops in the dishwasher-this will ruin them!  
  • Put only the jars into a separate pot that has simmering water enough to cover them by about an inch-this will keep the jars warm so they won't crack when you put your hot food into them in a bit.
  • Seal tops: Have another small/shallow pan on the stove with not-quite simmering water.  Place your seal tops in the hot water 10 minutes before you are ready to use them.  This will prepare the wax sealant that is on them.
  • Jar grabber (most likely NOT the official term for this tool):  This is a must have for canning.  You need this to grab the cans out after they have been in boiling water.
  • A large stockpot with canning rack.

THE PROCESS USING WATER BATH CANNING METHOD:

  • Once your Piccalilli is done cooking (enjoy the free, amazing smells while it does), take a jar out of the simmering water and fill it with the relish, leaving 1/2" of head space (the space left from the top of the jar down to the food level).  There are handy canning-measuring tools for this that are typically available at the grocery stores that I found very useful.  
  • Take a non-metallic tool to slide along the inside of the jar to remove any air bubbles (metal could crack the hot jar).  If you skip this process your jars may not seal right.
  • Take a paper towel or cloth and wipe the top rim of the jar clean (again, to provide the proper seal).
  • Take some tongs and remove a lid seal out of the shallow pan and place directly on top of the jar.
  • HAND TIGHTEN the lid on.  If you over tighten the lid it will not allow air to escape during the processing and your jars will not seal.
  • Place the Jar into a canning rack (mine looked like a metal vegetable steamer basket). 
  • Complete this process for all of your jars.  Make sure that jars do not touch each other in the water bath.  
  • Make sure that your jars are covered with about 2" of water.  If you need to add more, use hot water so you don't risk cracking the jars.
  • Bring the water for your stockpot water bath to a rolling boil.  Start the timer once it gets to this point and process for 10 minutes.  
  • Remove each jar with your Jar Grabber and place them on a cooling rack covered with a towel (this keeps the jar from coming in contact with surfaces that might be too cold, etc and cause your jars to crack).  
  • Listen for the PING!  Allow the jars to cool for 20 minutes before testing for a seal.  You can gently push on the top of the lid to see if it has sealed.  If there seems to be some give or you can push that lid down, it did not seal and you will need to refrigerate it and use within 2-3 weeks (depending on what it is).  
  • If your seal is good, allow the jars to cool completely for 12-24 hours and store in the pantry for up to 1 year.


I must admit the sweet victory I felt when I heard all 8 jars PING one after the other.  Oh yeah! The air-fist-pump was in full action that night!  


We just had this flavorful sweet relish on Hamburgers with sauteed mushrooms tonight and it was DELICIOUS!  It tasted like gourmet burgers Fresh From Home ;-)


If a first-timer-brown-thumb-clumsy-country-bumpkin-in-the-city can can, you can too!  You'll have to just trust me on that one.

P.S.  If you are family, please be surprised when you get something like the above pictured item for your Birthday and/or Thanksgiving and/or Christmas!


Pin It!

Saturday, September 22, 2012

The Coop-Scoopin'-Boogie, Piccalilli and.....Bieber??

OK-so today was CHORE DAY at the "Fresh From Home" household.  Yup, there was tub-scrubbin', floor cleanin' and dish washin'.  Not to mention, I began a first-time-ever journey that had to do with
                                                                                                                 THIS.....................


THESE...........................                     


and  LOTS OF THESE........................................

Can you guess what I ventured into today????  Oh yeah-and don't forget that we had some coop-cleanin'-boot-scootin'-boogyin' good times today all while jammin' to......Justin Bieber music.  Oh yeah-it doesn't get much better than this in the 'burbs!
Come on down and make sure you are subscribed to Fresh From Home so you can catch the rest of the story, learn about Piccalilli and how to make it.www.backyardhomesteadadventure.blogspot.com

Pin It!

Thursday, September 20, 2012

Brussels Sprouts: Fresh from the Garden and into the Kitchen!

I had a friend at work that had grown Brussels Sprouts in the past and she explained how they grow along the stalk of the plant, rather than just dangling from the plant as I had previously imagined (somehow, in my mind, I was picturing something resembling a vegetable Christmas tree.  I guess I wasn't THAT far off....). 


They seem to be slow to develop this year with the drought and super hot temperatures, but things are starting to cool down and they seem to be kicking into gear!  In fact, they are ready for their closeup......

Cute little Sprouts, aren't they?  I started this from seed right in the pot in the spring, thinned them out to leave the strongest seedling to grow, and added the ornamental flowers later for some 'pretty' in the mix.  The plant itself is such a neat looking thing; everyone that visits says "What is THAT?"  It's been worth growing just for the conversation factor. If you run out of things to say at a dinner party you can always start talking about your Sprouts, right?


The Sprouts pot mid-summer
OK, maybe I'm just used to dinner parties with my chickens, so don't take my social advice; but Brussels Sprouts are easy and fun to grow.  They are a slow growing and hardy plant, and mature best when cooler weather hits.  In fact, they enjoy a little bit of frostiness!  Hopefully mine will start looking like this soon.....

Brussels sprouts plant stalk with buds and leaves cut away

Plant your seeds (or a more mature transplant) in the spring in a spot with well drained, fertile soil and at least 6 hours of full sun.  I am growing these in a large pot this year and they seem to be doing very well!  Try something new when planning your garden for spring next year (it's never too early to start thinking of new garden ideas).  Before you know it, your patience with this Brassica (or cabbage-family) vegetable will pay off with a bountiful harvest, and then you can try one of these fantastic recipes!  Please leave a comment and share what you know about this interesting vegetable, or share your own fantastic recipe with everyone-we can never have enough of those!

                                                                                              
Brussels Sprouts with Pecans Recipe
Brussels Sprouts With Pecans  8 servings  (LOVE this one from the 2002 Cooking Light magazine)

2 teaspoons butter
1 cup chopped onion
4 garlic cloves, thinly sliced
8 cups halved and thinly sliced Brussels sprouts (about 1 1/2 pounds)
1/2 cup fat-free, less-sodium chicken broth
1 1/2 tablespoons sugar
1/2 teaspoon salt
8 teaspoons coarsely chopped pecans, toasted

  1. Melt butter in a large nonstick skillet over medium-high heat. Add onion and garlic; sauté 4 minutes or until lightly browned. Stir in Brussels sprouts; sauté 2 minutes. Add broth and sugar; cook 5 minutes or until liquid almost evaporates, stirring frequently. Stir in salt. Sprinkle with pecans.


 Brussels Sprouts Gratin (a not-so-light way to cook them, but OH is this GOOOOOD!)
                                                                          4 servings

1 pound Brussels sprouts, cleaned and trimmed
2 slices bacon, cut into 1/2 inch pieces
salt and ground pepper to taste
1/2 cup heavy cream
1/4 cup bread crumbs
1/4 cup grated Parmesan cheese
2 tablespoons butter, cut into tiny pieces

    1.  Preheat an oven to 400 degrees F (200 degrees C). Lightly grease a baking dish.
    2.  Bring a large pot of lightly salted water to a boil. Add the Brussels sprouts and cook uncovered until tender, about 8 minutes. Drain in a colander, then immediately immerse in ice water for several minutes until cold to stop the cooking process. Once the Brussels sprouts are cold, drain well, and cut in halves or quarters, depending on size. Set aside.
    3.  Meanwhile, place the bacon in a large, deep skillet, and cook over medium-high heat, turning occasionally, until limp and lightly browned, about 5 minutes. Reduce heat and stir in the Brussels sprouts. Season with salt and pepper then toss for about 1 minutes to evenly distribute the seasonings. Arrange bacon and Brussels sprouts on the prepared baking dish. Pour cream evenly over the Brussels sprouts, then sprinkle breadcrumbs and Parmesan cheese on top. Distribute pieces of butter over the bread crumbs.
    4.  Bake in the preheated oven until golden brown and heated through, 20 to 25 minutes.  

      Roasted Brussels Sprouts Recipe Roasted Brussels Sprouts    Simple, yet oh so delicious!
                     6 Servings

      1 1/2 pounds Brussels sprouts, ends trimmed and yellow leaves removed
      3 tablespoons olive oil
      1 teaspoon salt
      1/2 teaspoon black pepper
      1. Preheat oven to 400 degrees F.
      2. Place trimmed Brussels sprouts, olive oil, salt and pepper in a large resealable plastic bag. Seal tightly, and shake to coat. Pour onto a baking sheet, and place on center oven rack.
      3. Roast in the preheated oven for 30 to 45 minutes, shaking pan every 5 to 7 minutes for even browning. Reduce heat when necessary to prevent burning. Brussels sprouts should be darkest brown, almost black, when done. Adjust seasoning with salt, if necessary. Serve immediatelywww.backyardhomesteadadventure.blogspot.com

      Pin It!

      Saturday, September 15, 2012

      Cranberry-Apple Pie (Crumble)

      With Fall finally starting to show signs of appearing here in Colorado, we decided to have a fall family get together.  My mother in-law said that she wanted to bring this delicious dessert so I asked if I could feature her and the pie recipe on my blog!  Thank goodness she agreed, because this pie was amazing and I just HAVE to share it with you all!  The recipe came from ABC's show called The Chew.  She mentioned that the pie came out a bit like a crumble for some reason.  I am not sure if that was the intention of the original recipe, but boy was it perfect!  This recipe gave the delicious sweet and tart apple flavors on top of a traditional pie crust AND is perfectly finished with a sweet crumble topping.  Pair this with a scoop of vanilla ice cream and you have a heavenly dessert!
      
      
      Delicious pie credit goes to Suzanne-THANK YOU!


      CARLA HALL'S CRANBERRY APPLE PIE
      *Note:  You can make your own pie crust as detailed below, or purchase a store-bought one as a time-saver.


    1. 2 3/4 cups all purpose flour
    2. 2 sticks (8oz) and 1/2 cup chilled butter (cut into ½-inch cubes)
    3. 1/3 + 1/4 cup water
    4. 1 teaspoon and a pinch of salt
    5. 1 Tablespoon and 1/4 cup granulated sugar
    6. 4 Granny Smith apples (peeled and diced)
    7. ½ cup frozen cranberries
    8. ½ cup dried cranberries
    9. 1 ¼ cup brown sugar
    10. ¼ teaspoon nutmeg
    11. 1 teaspoon cinnamon
    12. 1 lemon (zest and juiced)
    13. 2 Tablespoons corn starch
    14. 1 teaspoon vanilla
    15. 1/3 cup pecans (chopped)


      • 1/3 cup water
        1 teaspoon salt
        1 Tablespoon sugar
        For flaky pie crust: Combine water, salt, and sugar in measuring cup. Stir and place cup in fridge for at least 15 min (to chill water and to dissolve sugar and salt). If possible, chill mixing bowl and paddle attachment if possible.
      • 2 cups all purpose flour
        2 sticks (8oz) chilled butter (cut into ½-inch cubes)
        Combine flour and butter pieces in mixing bowl. On medium speed with mixer, cut butter into flour until butter pieces are the size of small pebbles. With the mixer running, pour the water from previous step into the butter mixture. Mix until the dough comes together.
      • Separate the dough into 2 disks. Wrap each with film and chill.
      • Roll chilled pastry dish out to fit a 9-inch pie dish. Prick all over dough with a fork. Bake on 375 for 10-15 minutes, or until it is lightly golden. Set aside to cool. Carla tip: if you don't have time to make the crust a store-bought flaky crust will do.
      • 4 Granny Smith apples (peeled and diced)
        ½ cup frozen cranberries
        ½ cup dried cranberries
        Pinch Salt
        ¼ cup brown sugar
        ¼ cup granulated sugar
        ¼ teaspoon nutmeg
        ½ teaspoon cinnamon
        1 lemon (zest and juiced)
        For Cranberry Apple Filling: In a large bowl, combine apples and cranberries (frozen and dried) Stir in salt, sugars (brown and granulated), nutmeg, and cinnamon. Stir in the zest and juice of 1 lemon. Carla tip: if you don't like cranberries try dried cherries or raisins instead.
      • 2 Tablespoons corn starch
        1 teaspoon vanilla
        ¼ cup water
        In a small bowl, combine water, cornstarch, and vanilla. Quickly stir mixture into apples. Adjust seasoning if desired.
      • Fill pie dish with apple filling.
      • 1 cup brown sugar
        ¾ cup all-purpose flour
        ½ teaspoon cinnamon
        1/3 cup pecans (chopped)
        ½ cup butter chilled butter (cut into ½-inch cubes)
        For Crumble Topping: Place all the topping ingredients (Seen at left) into food processor and process until butter has been cut into the mixture. Carla tip: if you over mix your crumble just add extra nuts or oatmeal.
      • Sprinkle topping over top of pie filling. Bake at 375 deg F for 30 minutes.

      Pin It!

      Friday, September 7, 2012

      Have you espaliered lately?

      Does anybody want an apple tree that produces more fruit but takes up less space?  Would you consider an apple tree if I told you it was well suited for small spaces and, in fact, could be shaped to fit your specific needs?  What if that apple tree was also a creative work of art that is sure to be the highlight of your landscape?  Enter the Espaliered Fruit Tree!

      es·pal·ier (from dictionary.com)

      1. trellis or framework on which the trunk and branches of fruit trees or shrubs are trained to grow in one plane.
      2. a plant so trained.

      Personally, I like definition #2:  a plant SO trained....if only, right?

      The espaliered tree has its roots from centuries ago in Europe where it was very common to espalier a tree.  This was especially done to fruit trees and you would find them beautifully espaliered against castle walls and hugging the walled cities.   
      This is still a common gardening practice in Europe, but not so much in the US for unknown reasons.  Espaliered trees do take time to develop and there is regular pruning involved to keep it growing the way you want it to.  The best part about an espaliered fruit tree is that it does not sacrifice fruit yields for it's beautiful design!  You will still receive a bountiful harvest due to the increased sunshine and circulation that results from the espalier technique!

      There are many types of trees that do well with espaliering. Among them are Apples, Plums, Pears and Peach or Fig trees for warmer climates.  Today we tackle the beautiful blooms and delicious fruits of the Apple Tree!

      Step One:  Choose your style

      There are many different ways to espalier a tree.  This can be done as a simple horizontal structure with branches simply reaching out on each side, to an elaborate lattice work of interwoven limbs.
      Be creative with your design choice, but the more elaborate the design, the more time you will spend pruning and shaping.  Draw out your design first; you can even draw it with chalk against the wall or fence where you will be planting your tree.  The design I will be focusing on is perhaps the most simplistic for beginners: the Horizontal design.  This design also lends itself well to espaliering with apple trees!  It also forces more fruit spurs to develop, which means more fruit!
      Step Two:  Choose your Pick!

      There seem to be endless varieties of apple trees to choose from these days, but the dwarf or semi-dwarf varieties work well for espaliering, especially for those of us with limited space.  I love the look of the espaliered apple tree with it's beautiful and fragrant spring flowers! 
      espaliered-apple-trees.jpg 

      My best advice for selecting your apple tree is to speak with your local nursery.  They should have some knowledgeable people there that can tell you which trees grow best in your region.  You will want to purchase a seedling (defined as 1-3 years old). Also look for varieties that are inherently disease resistant.  The major apple diseases are apple scab, powdery mildew, and fire blight.  Let the nursery expert know that you are looking to espalier an apple tree and ask them to help you with your selection.  Here are some helpful questions you may want to consider asking them:
      *Can this type be pruned a lot and still produce fruit?
      *Does it need a pollinator,or is it self-fertilizing?
      *How big will it get?  (The term "dwarf" can mean it grows anywhere from 4 to 16 feet tall)
      *How long does it need to recover after transplanting before beginning to prune/train?
      *Does it require any special care?
      *Are the apples TASTY?


      Once making your selection, it's time to set it up!  Follow the nurseries instructions for planting in the ground, and follow the next steps to get the espalier process started.  If you will be espaliering your apple tree against a wall, be sure to plant it at least 6" away in order to allow for proper circulation.  South or West facing locations with at least 6 hours of full sun are ideal, especially if you can do this against a brick wall, as the tree will benefit from the radiant heat.  Also, for best results, allow it to recover after transplanting before doing any pruning or shaping; this can take 2-3 months depending on the tree's variety and the time of year you plant it.

      Step Three:  The Set-up

      Once you bring your seedling home, let's make sure you have the proper set up in order to begin the espaliering process.  Your tree will need a support structure as it learns to grow to the shape you want it in, as well as for when it begins to develop fruit (some trees will take 2-3 more years to produce fruit after planting them-so be patient)! 

      If you will be anchoring directly to an exterior wall or fence, you can use eye bolts, turnbuckles (these allow you to adjust the tension on the wire), and sturdy wire cable to set this up.  It can take up to 3 years to fully espalier a tree, so you want to make sure you invest in the proper set up here.
      If you want your apple tree in a different location, you can simply put sturdy posts in the ground in your desired location and string the wire between them.  You can set this up for an orchard, or as a living fence, border, or focal point of your yard. 

      For the Horizontal espalier, set posts in the ground equidistant lengths from the trunk on each side.  Then, drill holes and secure eye bolts at  16" intervals along the posts (fence/wall/lattice), starting your measurements from the ground up.  Then, string your wire between them, connecting with turnbuckles so you can adjust the wire tension as needed for support as it grows.  Here is a great video on a simple espalier setup:  http://www.youtube.com/watch?v=h2qb25W7c2Y
      You can even create some extra space beneath or around your espalier to plant strawberries or other annuals/perennials around them.

      Step Four: Shape it up
      Shaping an espalier is quite simple, but can be slightly time intensive, depending on your design.  For our horizontal shape, you will train the limbs that are nearest your wire to grow horizontally along its length.  Tie the limbs onto the wire with garden tape to secure them in place.  You will need to prune off the excess limbs in order to maintain your desired shape as it grows.

      BASIC PRUNING PROCESS: Do the majority of pruning every year in late winter or early spring, while the plant is dormant. Remove branches that grow in the opposite direction from your chosen design, especially those that are growing out towards you, or those trying to stick out behind the design.  Redirect the trees growth by pruning to the buds that face the direction you want the tree to grow.  Small branches can be removed almost anytime during the year, as long as you don’t remove too much. Avoid pruning in late summer and early fall.  Once your tree branches reach 'the end of the line' for your design, you can snip it off.  Just keep in mind that pruning redirects growth significantly, and you don’t want to cut off the end of a branch until you are sure it’s as long as you need it to be.

      For some quick espalier pruning tips (and a great description of espalier benefits), go to: http://www.youtube.com/watch?v=WnnqGpjA4EA

      There are also a lot of good books out there about pruning in general, as well as some that include information on espalier-specfic pruning (not to mention the wealth of information available online these days).

      Step Five:  ENJOY IT! 

      While an espaliered fruit tree can takes some time in the beginning stages, it requires little maintenance for pruning once or twice yearly thereafter.  These trees bring a stunning design to your landscape and delicious production to your garden that will surely be your favorite masterpiece in the years to come!

      P.S. And don't forget to give all of that fallen fruit you weren't going to eat to your backyard chickens!


      Pin It!

      Loud-mouthed, errr beaked, chickens

      OK-anyone know how to make a chicken stop hollering like a goose??  We have one Plymouth Barred Rock hen who wants to make sure that our neighbors in the next county hear her-regardless of the time of morning, day, night, etc.  She is LOUD.  Yes, she gets loud when she sings her "egg song" just before laying, but this loud noise making is a constant thing with her.  One of the other hens that used to be very quiet now seems to be mimicking her noises (but this one has actually added a guttural gurgling sound to it...).  They love to free range in the yard and I almost wonder if she is yelling at me to let her out.  They have a very large run with ample space, but they are spoiled and get to have run of the yard occasionally.
      
      The loud-beaked culprit....George

      I love the sound of chickens in my backyard and only worry about the excessive noise from George due to our city-setting and close proximity of neighbors.  And, seriously, the barking dogs and screaming kids in the neighborhood are way louder than George......usually. 

      I have tried: verbally correcting them, picking her up,clapping with the verbal correction (to which she would sometimes stop briefly, then start in even LOUDER.  I think if chickens could cuss, that's what she was doing).  SO, we are trying something new.....we have a spray bottle filled with water and will squirt it in the offenders direction when the noise gets out of hand.  Surprisingly, it seems to be working.  I am home today and haven't heard the goose-honking noises coming from the backyard so far.


      What are your thoughts on this?  Should I just 'forget-about-it?'  Is my resistance futile, OR am I being a good neighbor with my attempts at chicken-sound-training?

      Pin It!

      Sunday, September 2, 2012

      A Gnome, Vacation, Fall Planting and Purple Carrots (Trust me, they GO together)!

       
      We are back in the swing of things here after a week of vacation.  There's something about spending time away from home that makes you miss your home :-)  We vacationed in both Wyoming and Montana and saw some beautiful sites and awe-inspiring landscapes. 
      I never cease to be amazed at God's handiwork that is all around us.

      My husband and I have such a deep-rooted yearning for farming and working the land that it seemed everywhere we drove we were saying, "OH, that's the perfect spot for a house-and the chicken farm would be over there!"  Or, "A house needs to be plopped down right there!  And the goats would go there!"  Yes, even the desolate, dusty, lonely areas of Wyoming were looking pretty good to us. 
      However, upon our return, we just know that we are in LOVE with Colorado.  It really is beautiful here and we hope that God has some land (and lots more critters) in store for us as part of His plan for our lives.  Until He moves us in that direction, we try to stay busy in our backyard!
      
      10 points if you can "name that chicken's tail!"
      Since coming back a couple days ago, I have finally gotten around to planting some more of my fall crops.  I seeded a bunch more carrots-purple ones to be exact!  My husband and I had a date night tonight and walked around the local Nursery (not the baby human kind-the plant kind!  It's much more romantic for us at this stage in life ;-)  I asked if they ever carried Jerusalem Artichokes/Sunchoke tubers and she said, "No, but I would be willing to bring you some from my own garden in a few weeks."  Ummmm, OK!  I am so excited to try these for the first time in my backyard garden.  They will be going in along the fence near the chicken run.  I also planted some Spinach and Kale to complete the fall garden for my backyard raised beds.  I still have 2 different Tomato plants that are  finally ripening; 4 Okra plants that are growing nicely to my surprise; Brussels sprouts that are sprouting; plenty of various carrot sizes, 3 Eggplants, 3 different pepper plants-a-popping and a chicken-in-a-pear-tree (kidding on that last one....but maybe that'll be next year...)

      I must tell you that gardening in my small urban backyard with 4 very content chickens roaming during free-range time and the husband pulling weeds behind me, ranks right up there as the most content evening a girl could have (lookout all you party people)!  The chickens provide us with endless entertainment during our evenings in the backyard.  I looked up at one point to see my husband working on preparing spots in the yard to re-seed.  I also saw that George, the alpha hen, was following him around hoping that he would PLEASE just drop some of those seeds he was carrying around in that bag!   George was being so stealthy that my husband didn't even notice her watching his every move!  Then there was THIS moment when we stopped for a break.....
      They were all scratching some seed that was thrown down, but that short guy with the tall red hat was VERRRRYY suspicious. Each one of them kept a different eyeball on that thing the entire time! (But seriously y'all, the Garden Gnome has become a great chicken deterrent when put in pots! Don't believe me, then try it yourself! He just gives 'em the evil eye and they steer clear of the Hostas for now).
       
      After we were done gnoming-around, we got back to working.  It feels so good to have learned a little bit more each year about how to have a more productive garden-even if it is a small space in a small backyard.  I learned the first year that I could plant more than once after Spring (no joke)!  I can plant carrots every 2 weeks to have a continual harvest throughout the season.  I learned that there are different crops for each season that I can try.  I learned that there are some good producing, easy growing crops for Colorado, such as: Carrots, Beans (bush types that support themselves nicely in rows-or the pole kind for climbing), Radishes, Beets,Turnips, Chives/Green Onions, Tomatoes, Peppers, Onions, Peas, and lots more.  I have also learned that I don't really need a ruler and precision seed-droppings to have a successful garden.  As previously posted in How it all started-the raised vegetable garden, I use the Square-foot gardening method.  I have gotten so much harvest out of a small amount of space that I am sold on this technique.  I don't have to do much weeding at all, haven't had any pest concerns and everything has grown like crazy!  PLUS, with chickens around, I don't need to do ANY hand mixing of the dirt when preparing the ground for new crop plantings.  I pulled some cucumber plants so that I could plant my purple carrots.  After pulling the old plants, I placed some compost on top of the dirt and WAITED.  I didn't have to wait more than about 10 seconds.....

      They churned that dirt like pros!


      Red and George made short work of mixing up a great area for my purple carrots-and I didn't even break a sweat!  They did the same for my spinach and lettuce area later.  Did I mention I love these chickens??
       
      
      With my seeds planted for fall crops and 2 of the 4 'girls' laying eggs, I am loving my backyard garden.  I never thought my brown-thumbed-self would be gardening her heart out in the backyard and loving every minute of it!  I encourage everyone to start growing at least one thing of their own for food.  No yard?  Grow 'em in pots!  You might even want to get you one of them-thar Garden Gnomes too..........................................yeah, it's kind-of growing on me!


      Pin It!