

They seem to be slow to develop this year with the drought and super hot temperatures, but things are starting to cool down and they seem to be kicking into gear! In fact, they are ready for their closeup......
 Cute little Sprouts, aren't they? I started this from seed right in the pot in the spring, thinned them out to leave the strongest seedling to grow, and added the ornamental flowers later for some 'pretty' in the mix. The plant itself is such a neat looking thing; everyone that visits says "What is THAT?" It's been worth growing just for the conversation factor. If you run out of things to say at a dinner party you can always start talking about your Sprouts, right?
 |
| The Sprouts pot mid-summer |

Plant your seeds (or a more mature transplant) in the spring in a spot with well drained, fertile soil and at least 6 hours of full sun. I am growing these in a large pot this year and they seem to be doing very well! Try something new when planning your garden for spring next year (it's never too early to start thinking of new garden ideas). Before you know it, your patience with this Brassica (or cabbage-family) vegetable will pay off with a bountiful harvest, and then you can try one of these fantastic recipes! Please leave a comment and share what you know about this interesting vegetable, or share your own fantastic recipe with everyone-we can never have enough of those!

2 teaspoons butter
1 cup chopped onion
4 garlic cloves, thinly sliced
8 cups halved and thinly sliced Brussels sprouts (about 1 1/2 pounds)
1/2 cup fat-free, less-sodium chicken broth
1 1/2 tablespoons sugar
1/2 teaspoon salt
8 teaspoons coarsely chopped pecans, toasted
1 cup chopped onion
4 garlic cloves, thinly sliced
8 cups halved and thinly sliced Brussels sprouts (about 1 1/2 pounds)
1/2 cup fat-free, less-sodium chicken broth
1 1/2 tablespoons sugar
1/2 teaspoon salt
8 teaspoons coarsely chopped pecans, toasted
- Melt butter in a large nonstick skillet over medium-high heat. Add onion and garlic; sauté 4 minutes or until lightly browned. Stir in Brussels sprouts; sauté 2 minutes. Add broth and sugar; cook 5 minutes or until liquid almost evaporates, stirring frequently. Stir in salt. Sprinkle with pecans.
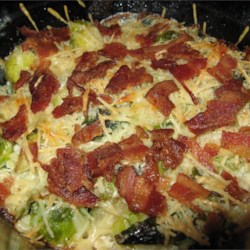
Brussels Sprouts Gratin (a not-so-light way to cook them, but OH is this GOOOOOD!)
4 servings
 1 pound Brussels sprouts, cleaned and trimmed
2 slices bacon, cut into 1/2 inch pieces
salt and ground pepper to taste
1/2 cup heavy cream
1/4 cup bread crumbs
1/4 cup grated Parmesan cheese
2 tablespoons butter, cut into tiny pieces
- 1. Preheat an oven to 400 degrees F (200 degrees C). Lightly grease a baking dish.
- 2. Bring a large pot of lightly salted water to a boil. Add the Brussels sprouts and cook uncovered until tender, about 8 minutes. Drain in a colander, then immediately immerse in ice water for several minutes until cold to stop the cooking process. Once the Brussels sprouts are cold, drain well, and cut in halves or quarters, depending on size. Set aside.
- 3. Meanwhile, place the bacon in a large, deep skillet, and cook over medium-high heat, turning occasionally, until limp and lightly browned, about 5 minutes. Reduce heat and stir in the Brussels sprouts. Season with salt and pepper then toss for about 1 minutes to evenly distribute the seasonings. Arrange bacon and Brussels sprouts on the prepared baking dish. Pour cream evenly over the Brussels sprouts, then sprinkle breadcrumbs and Parmesan cheese on top. Distribute pieces of butter over the bread crumbs.
- 4. Bake in the preheated oven until golden brown and heated through, 20 to 25 minutes.
 Roasted Brussels Sprouts Simple, yet oh so delicious!
1 1/2 pounds Brussels sprouts, ends trimmed and yellow leaves removed
3 tablespoons olive oil
1 teaspoon salt
1/2 teaspoon black pepper
- Preheat oven to 400 degrees F.
- Place trimmed Brussels sprouts, olive oil, salt and pepper in a large resealable plastic bag. Seal tightly, and shake to coat. Pour onto a baking sheet, and place on center oven rack.
- Roast in the preheated oven for 30 to 45 minutes, shaking pan every 5 to 7 minutes for even browning. Reduce heat when necessary to prevent burning. Brussels sprouts should be darkest brown, almost black, when done. Adjust seasoning with salt, if necessary. Serve immediatelywww.backyardhomesteadadventure.blogspot.com

Yum! Brussels sprouts are a tradition on our Thanksgiving table, and also often the topic of conversation at the same time, because they are so, so good. (People talk --chickens are not invited to this particular dinner!!)
ReplyDeleteThanks for the fun article and good looking recipes. I'm going to try roasting them first, and then move on to one of the other recipes.
You get to have "people talk" dinners?? I'm so jealous! (kidding, of course) So glad to hear these are a tradition for your Thanksgiving-maybe you've introduced a new and delicous way to cook this vegetable to a few people along the way!
DeleteThe recipes look delicious. Hopefully we will grow some next year. A few years ago we had them growing and a Woodchuck had them for dinner before we did.
ReplyDeleteA woodchuck? MAN-that would be frustrating since these take so long to really start producing! I hope you sent that guy packing off to do some chucking elsewhere!
DeleteI luv these vegies and have them as often as I can find them fresh at the grocery. Frozen will not do for the way I prepare them (and many other vegies... it keeps me from having a stove top to clean1)
ReplyDeleteThis idea first came about through a recipe for roasted asparagus which I now do not eat any other way... the sprouts either. And I recently extended the idea to summer squash. The sprouts become a snack item that I munch after having them as a dinner item. They do seem to require a bit more salt than other vegies.
Anyway, I just put my vegies on a lined cookie tray, drizzle some olive oil over them, sprinkle with Hawaiian sea salt and black pepper and then moosh them all around on the cookie sheet to coat. I put them in a 400 degree oven for about 10 to 15 minutes; checking on them and shaking the pan a few times. I like my vegies browned on the outside and still a little crunchy on the inside so this works perfectly. I think I'm going to try green beans this way next.
We also love tomatoes cooked in the oven. In this case, however, we lower the oven temp to about 200 degrees and allow plenty of time for them to become luscious (hours). The longer you leave them in the oven the drier they become and can be bagged and frozen for use later in sauces or as toppings... basically they are like sun-dried tomatoes. They, too, get the oil, salt and pepper bath. I do cut them in half and shake out as much liquid and seed as I can before roasting. Italian plum tomatoes are excellent for this because they are meatier and have less liquid starting out.
For something a little fancy you can mix mayonnaise and finely grated parmesan cheese into a thick mixture, add salt and pepper, spoon on top of your tomatoes that have baked down to where they are still moist and bake a bit longer until the filling is puffed and brown. This is so yummy!!!
I know I am responding to a pretty old post but I have been enjoying going through your blog which I just found through Farm Chick Chit Chat. I found them through Farmhouse 38 which I totally love even though I don't have a chicken to my name!! Best of luck with your blog.
Hi Charlotte! Thank you so much for stopping by! I love your comments and I know I would like to try roasting some veggies this way-it sounds delcious and quite simple too! The may/parmesan mixture with the tomatoes sounds so so good! I always have a ton of tomatoes and you can bet this will be something I will try this year! Thanks for the ideas-I just love being able to learn from everyone!! My best to you as well!
Delete